Super Simple Berry Crumble

I can’t deny my sweet tooth. So I try to work with it, by creating as much as possible without adding processed sweeteners. And by that, I mean even the least processed sweeteners that would be considered ‘better choices’ …like pure maple syrup and raw honey, for example.

food fervourSince it’s berry season here again (and damn, if berries aren’t some of the best fruits you can eat, not just for their lower natural sugar content but also for their prolific nutrient value) but also still technically Winter, I have been playing around with Crumble recipes for a healthier, warm dessert option (but believe me, they are certainly highly edible straight from the fridge and cold the day after) and I’ve arrived at the ideal result …for me.

You see, it definitely won’t be as sweet as many of you would expect or desire …so you may want to add sweetener yourself. If so, I’d leave the berries/berry element alone and add something (rapadura or maple syrup) to the crumble mix, if you have to. The other alternative is to serve the dish up with my Macadamia Banana Creme coz it’s naturally sweeeeet!food fervour

You will need a food processor, powerful blender or …a Thermomix (!) and the following ingredients: 150gm blueberries, 100gm roughly chopped strawberries, 1 teaspoon vanilla essence, 30gm almonds, 60gm oats, 10gm shredded coconut, 50gm coconut/macadamia oil, 1 teaspoon vanilla paste

Preheat the oven to 180°C and grease the base of a small casserole dish (I used a 16x16cm square container) with a little coconut/macadamia oil.

Add 50gm blueberries, 30gm strawberries and vanilla essence to your blending appliance and pulverise these into a sauce. (Thermomixers blend for 10 seconds at Speed 5-6.) Place the remainder of the berries into the casserole dish and thoroughly mix the fresh berry sauce through.

Without rinsing out your processing appliance, throw in the almonds, oats, coconut, coconut oil and vanilla paste (as well as any additional sweetener you may wish to add) and blend briefly: 3 or 4 pulses in a blender or food processor or the Turbo function in a Thermomix. The oil and vanilla paste moisture may make the crumble sticky, but it should be pretty easy to break it apart to spread it evenly over the berry mix.food fervour

Pop it in the oven for 30 minutes, decide what you want to add to it – cream, custard (see left), ice-cream, Macadamia Banana Creme –  and be ready to devour it as soon as it’s done. 😛


Macadamia Banana Creme

I have nothing against cream. I love real dairy cream, but I rarely buy it. So when I feel like some, especially for ‘sweet’ occasions, I usually turn to yoghurt … of which I always have a plentiful supply.

Yoghurt however doesn’t always cut it. I love it, it’s SO good for my gut BUT… it’s tangy. That’s the only problem. Tangy works with fruit salad, even fruit flavoured cakes, but not chocolate.

I tend to think of avocado as ‘nature’s butter’ or ‘cream’ but its flavour isn’t easily disguised, and neither is its colour! Cacao (or cocoa) seems to be pretty much the only thing with the flavour and colour intensity to use with it. (See my Cacao Avocado Mousse recipe.) Nut creams (like my Vanilla Brazil nut Cream for instance) are easy as well but, like the avocado option, they also require added sweeteners, even if only a little.

Having played around with banana before (we all know you can make dairy free ice cream with it, and even grain free pancakes) particularly as a whole food sweetener, I struck upon the idea of combining it with finely milled nuts. Guess what? It works!

The only downside (which isn’t really an issue) is that it’s better made and eaten fresh, since the blending process causes oxidation that will turn the creme ‘brown’ (see pic below). Fresh is best anyway, right? (…for nutritional content.) Also, the thicker you make it, the more likely it is that it’ll be ‘grainy’ but if you’re pedantic about it being smooth, simply press through a sieve or squeeze through loose weave muslin cloth (or nut milk bag).

food fervour

Oxidation causes changes and you can see the creme on this cake has ‘browned’. It didn’t affect the flavour at all 😉


All you need is a high powered blender, 100gms of macadamia nuts, 1 banana (the riper, the sweeter) and your milk of choice to alter the thickness of the creme… (I used 1-2 teaspoons (5gm) to make the spreadable creme for the cake above).

Firstly, mill the nuts (Thermies: 10 seconds at Speed 7-8). You may want to scrape down and repeat.

Scrape down before adding the roughly chopped banana and milk. Again, blend again at Speed 7 for 10 seconds, scraping down and repeating if you wish (I did).

Voila, you’re done! It’s ready to go. I’d love to hear what you think and the creative ways you use it. 🙂


Borscht: the Beetroot Soup

I love this stuff! Probably because I know how good beetroot is for you. But this soup has other greatness in it too: onion, leek, carrot and cabbage. They’re all powerful anti-oxidant containing veggies. I particularly like veggies of the allium (onion & leek) and cruciferous families (cabbage) because they help to remove heavy metals from our bods (‘de-toxify’ us) but the old carrot’s beta-carotene (for vitamin A production) content makes it a valuable ingredient too.

Borscht is an Eastern European (think Poland, Russia) dish and traditionally includes meat; usually beef or veal but sometimes pork. I prefer to make mine meat-free, though. But when I say meat-free, I mean there’s no chunks of animal flesh in it. To clarify, I like to use a beef stock. But all you veggos out there rest easy… I have made it on a veggie stock base a few times and it’s still just as delicious.

Soups are pretty easy meals to make but when you have a Thermomix they’re even easier again. I’m providing the recipe for both methods, but the Thermomix will yield less because, unless you’re lucky enough to own the newest model (TM51) it simply doesn’t have the capacity to safely hold the same quantities as a large saucepan can.Food Fervour

So, Manual Cooks, you will need: 1 tablespoon extra virgin olive oil (EVOO), 1 chopped onion, 1 chopped stalk celery, 1 chopped leek, 1 carrot, 2 beetroot, 250gm sliced cabbage, 1 tablespoon tomato paste (or 1 large tomato) & 5 cups beef (or vegetable) stock

Simply warm the EVOO in a large saucepan over a medium heat and add the onion, celery & leek. Sauté for about 3 minutes. Add the carrot, beetroot, cabbage, tomato/paste and stock and bring to a boil. Reduce the heat, cover and simmer for an hour. Carefully blend in batches

Thermomixers, you’ll need: 30gm EVOO, 1 small quartered onion, 1 roughly chopped stalk celery, ½ roughly chopped leek, 1 roughly chopped small carrot, 1 large  roughly chopped beetroot, 150gm sliced cabbage, 1 tablespoon tomato paste (or 1 large tomato), 3½-4 cups beef or vegetable stock

Placing the onion, celery and leek in the bowl, chop for 5 seconds on Speed 5 then add the EVOO and cook for 4 minutes on Varoma, Speed 1.5. Add the carrot, beetroot and cabbage and chop for a further 5 seconds at Speed 5. Add the remaining ingredients and set to cook for 22 minutes at 100ºC, Speed 1-1.5. Finally, set to 1 min 30 seconds and slowly accelerate to Speed 9.

Serve immediately and ENJOY!

My Anzac Biccie Swap-Outs

I really don’t need to post this recipe. I mean, ANZAC biscuit recipes are a dime a dozen, at least in Australia! But I thought I’d share it to demonstrate how easy they are to make even if you don’t have all the ‘original’ ingredients.Food Fervour

Because I avoid mass-produced, over-processed foodstuffs, I don’t own some of the ingredients a standard Anzac biscuit recipe would ask for. It’s actually very easy to adapt most recipes; it only requires a little thought to be ‘creative’.

Here’s my ‘edited’ ingredient list and the swap-outs I use… that work perfectly well!

125gm butter (I’ve successfully used 100gm coconut oil before too)

2 tbsp golden syrup 2 tbsp organic maple syrup

1 cup plain flour 1 cup wholemeal spelt flour (I’ve also used ¾ cup rice flour & ¼ cup almond meal for a low gluten/higher protein option)

1 cup oats

1 cup dessicated coconut

½ cup sugar ½ cup organic rapadura sugar (for those who despise fructose & don’t mind over-processed products, the same quantity of dextrose will work)

2 tbsp water

1/2 tsp bicarbonate of soda

And this is how simple they are to put together:

  1. Preheat the oven to 175ºC and line a couple of trays with baking paper
  2. Place the butter/oil and maple syrup in a small saucepan over a low heat
  3. In a large bowl, mix together the flour, oats, coconut and sugar
  4. Add the water & bicarb soda to the saucepan when the butter has melted, mix it up then add to the dry ingredients. Mix well.
  5. Form balls of mixture and place them on the baking trays, spaced well apart. Flatten them out …with a spatula, some other food utensil or even just clean fingers, then…
  6. Bake for 15 minutes or until golden. Cool on wire racks.
    Should makes about 20 biscuits, depending upon how big you choose to make them!  😉

    Food Fervour

    I garnished this batch with a good ol’ Aussie macadamia nut.


Crustless Pumpkin Pie

Okay so Pumpkin Pie isn’t really a ‘Thing’ in Australia. But when you’ve bought a butternut at the farmers markets that’s the size of a human baby, finding ways to use it all becomes a challenge. Especially when you discover that the one kilogram you require for a hefty batch of Thai red curry pumpkin soup leaves you still with two thirds of said vegetable to demolish!

Food Fervour

yep, that’s my big butternut!

A friend once told me that pumpkin should only ever be roasted because “it brings out the flavour”. I discovered he’s dead right: the natural sugars caramelise and boost the veggie’s flavour incredibly. So I always roast it now, and often in quantities over and above anything I happen to be making at the time. That is to say, I roast extra so I’m prepared.

So, with a decent quantity of ready-roasted pumpkin chillin’ in the fridge, I ruminated upon its sweetness and wondered, “Could I successfully make a no added sugar dessert with it?” I considered how sweet the frittatas I made with it were. Could I make a kind of pumpkin ‘dessert’ frittata? That’s when I really began thinking about pumpkin pie… but I certainly didn’t want to have to make pastry for a pie crust. (Hell no! That’s way too much work!) Surely a blend of eggs, cream, some spices & that sweet roasted pumpkin could work?

A Google search for ‘crustless pumpkin pie recipes’ revealed (apart from all of the results being American websites) that their ingredients were pretty much as simple as I’d envisioned. Most of them however use (ugh!) evaporated milk, egg ‘replacer’ or ‘substitute’ and of course, added sugar. God Bless America!

Except for the cooking times (roasting the pumpkin & the final bake) this recipe is ridiculously simple and very time efficient. If you pre-cook the pumpkin as I did, you’ll save even more time. (Really, roasting excess vege is a great, healthy habit to get into; it helps you to stay ‘prepared’. You can save time and expand your meals options for salads, frittatas, risottos …but they also make a better choice of snack if you’re a regular ‘fridge visitor’ like me!)

Now, if you haven’t pre-roasted your pumpkin, the basic method is to preheat your oven to 200ºC, line a tray with baking paper then arrange skinned and roughly cut chunks of lightly oiled pumpkin (EVOO is fine even though you’ll be making a dessert… you won’t even notice the flavour after the roasting) and bake them for 20-30 minutes (depending upon the speed of your oven). Don’t burn them! If a skewer slides in easily & the centre feels soft, you’re done. It’s probably a good idea to let it cool a bit before moving onto the pie recipe.Food Fervour

Here’s what I used for my pie:

430gms of roast pumpkin, 2 eggs, 200gm pure cream, the following spices: 1 teaspoon vanilla paste, 1 teaspoon cinnamon, ½ teaspoon ground ginger, ½ teaspoon nutmeg, ¼ teaspoon ground cloves & a pinch of salt, plus 50gm pecans (optional). What’s also optional is to keep some maple syrup handy to add later if you don’t think the batter is sweet enough for you. (But don’t go overboard; the more you add, the runnier the mix will be…)

Preheat the oven to 180ºC and grease & line a baking dish/casserole dish or round cake tin with baking paper, then simply throw all of the ingredients into a food processor or high-powered blender and mix well. (Thermies: a couple of 10-20 second rounds on Speed 5-6, with some scrape-downs, should suffice.) Pour the ‘batter’ into your prepared receptacle and sprinkle with extra cinnamon, then cook for 40 minutes, or until a skewer comes out clean. Food FervourNB: Because I used a smaller (16x16cm) dish, my pie was thicker so I let it cook for almost an hour. Bear in mind that a thinner pie = potentially less cooking time.

Allow to cool a little before trying to remove from the dish. Slice and serve up with more cream …or just enjoy it undressed. 😛

Food & Sun Sensitivity

Food FervourI’ve had a couple of skin cancer ‘experiences’ in the past couple of years: in late 2015 I had a BCC (basal cell carcinoma) cut out of the tender skin under my left eye and a pre-cancerous one removed from the outer corner of my right eye at the same time. (Yes, I did very much resemble a street-fighter… see right!) And earlier this year I was directed by my dermatologist to undergo a course of topical cream (Efudex) to kill off another spot on my left cheek. (You can’t miss that red dot in the pic below! That was about halfway through the treatment.)Food Fervour

It was only when I went for my check-up last week that I was given some information that I considered so important that it warranted this post. It’s not particularly new science, but I hadn’t heard of it before and it really surprised me because it involves particular (natural, everyday) wholefoods that I eat regularly.

Simply, some foods have been shown to increase your sensitivity to the sun. And I mean, when you eat these foods in daylight hours it’s an open invitation to skin damage. The dermo’s nurse literally said to me, “it’s like holding a magnifying glass against yourself and saying to the sun ‘Here I am! You’re welcome!'”

So what are they and what makes them so ‘dangerous’? Well, there are surprisingly quite a few, the most widely consumed being celery, carrots, figs and citrus fruit. And it’s because they contain psoralens.Food Fervour

Psoralens are a naturally occurring compound and “when activated by sunlight or another source of ultraviolet light (they) may have phototoxic, mutagenic and photo-carcinogenic effects”. Hence the nurse’s magnifying glass analogy. For a fuller explanation (and a great list of the foods that contain them) see this article I found on the website healwithfood.org (it’s the source for the above quote).

It doesn’t mean you shouldn’t eat these foods, it just becomes a timing thing. My doctor said to simply avoid consuming them before 4pm. (I know right, that’s a bit specific!) The gist is, save them for dinnertime …or anytime after dusk. So if you eat grapefruit or usually enjoy an orange or veggie juice (including carrot & celery) as part of your morning/breakfast (or even lunch) routine it’d be best to change that habit. (Don’t be juicing anyway, ’cause you’re losing all that super-beneficial fibre!) Check out this article on Brown University’s website, for a study conducted specifically with citrus fruits.

Of course, changing your consumption habits for psoralen-containing foods in no way means you should disregard your normal sun protection practises. Think of it as an added safety measure.


Instant Lychee Ice Cream

Ice cream is one of my weaknesses. But today I made some here at home, from scratch, and in less than 5 minutes …with two ingredients. Yes, just two, real, whole-food ingredients. No added sugar whatsoever.Food Fervour

All you have to have prepared for instant ice cream is some frozen fruit. I’ve always got fruit in the freezer; blueberries and bananas are staples but over summer I added mango flesh & lychee pulp to my stores and it was the lychee pulp I used to make my ice cream today. It’s sweet but hasn’t an overpowering flavour so it makes for the perfect ice cream to pair with other foods if you wish.

Now, I have to admit, I’ve done this plenty of times before, but with full-fat natural yoghurt. The plethora of gut friendly bacteria in yoghurt does make it a much healthier option but today I just didn’t want that tang. I love frozen yoghurt but I love ice cream more!

In typical fashion, I just threw every thing together in my Magic Bullet without measuring so I’m really guessing with quantities here… but I reckon I used about 1/3 cup of frozen lychee pulp & about 2 (hefty) tablespoons of Maleny Dairies pure cream. Maleny Dairies’ cream is the thickest natural cream I have ever come across so I’m going to add a disclaimer here and say that if you use ordinary, mass-produced pouring cream this recipe won’t work. If you buy your cream from the supermarket, I’m guessing you’ll be better off with ‘double’ or ‘thickened’ cream for this recipe. Similarly, if you’re thinking of trying this with coconut cream (vegans) it will have to be a really thick variety like Ayam brand …not the cheaper supermarket ones.

Simply throw them into your blender together, blend and scrape a couple of times and Bob’s your uncle! I served mine up in a dish with halved strawberries (see pic). You could pop it back in the freezer for awhile if you prefer it more solid… most home made ice cream is put through a number of alternating blend-and-freezes before serving. I just couldn’t wait that long! 😉

My Sugar Reset

Last week I had a rough week. It was rough enough to affect my appetite… I didn’t eat much at all. Not that that’s a problem. Fasting is valid, after all. But it also gave my body a chance to ‘re-set’ (that’s part of the fasting science too, btw).

What happened is that I somehow grew some Willpower. Now, I know what’s good for me when it comes to food and I eat extremely well most of the time… I’ll hardly ever part with my hard earned cash for junk food. But in my hospitality job, I’ve found it much harder to stop myself. I’ve analysed the potential reasons and have come up with two: I hate waste, so throwing out the amounts of food we have to ‘by law’ (food hygiene regulations… which really stem from the litigious fears) bothers me enough to stuff a piece of something in my mouth as I tip an untouched foodstuff into the bin (like, I’m eating this for all the Starving out there who can’t). And then there’s the much more intangible, abstract and highly subjective reason: reaction to dissatisfaction & fatigue. That is, “I’m over today and I wanna go home so I’m going to eat this food I don’t need” because ….just because. There’s really no excuse. (I developed a personal theory that ‘Time at Work’ and Willpower are inversely proportional: that is to say, my Willpower decreases the further into a shift I get.)

But really, it all boils down to Self Control. And I have that in large doses in some ways, and not – it would seem – in others.
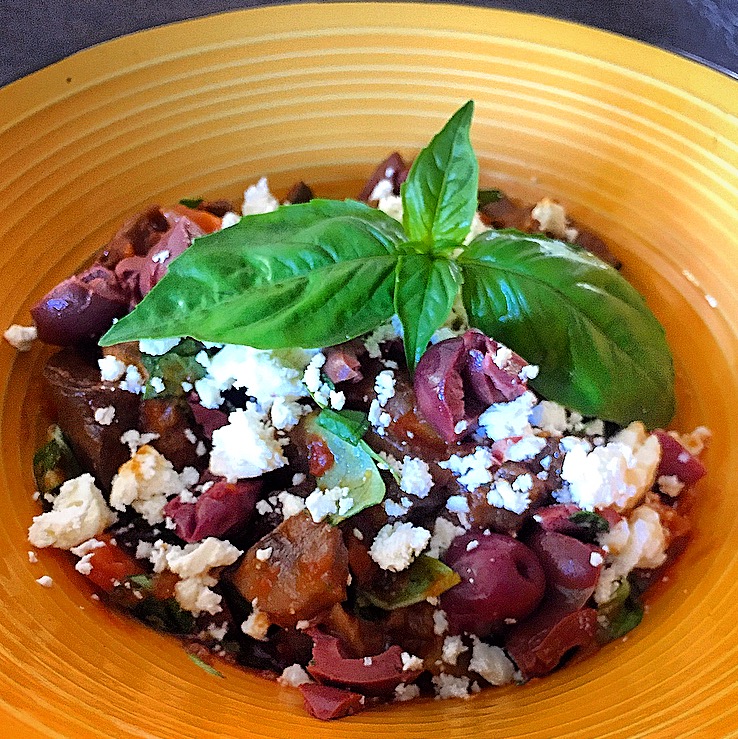
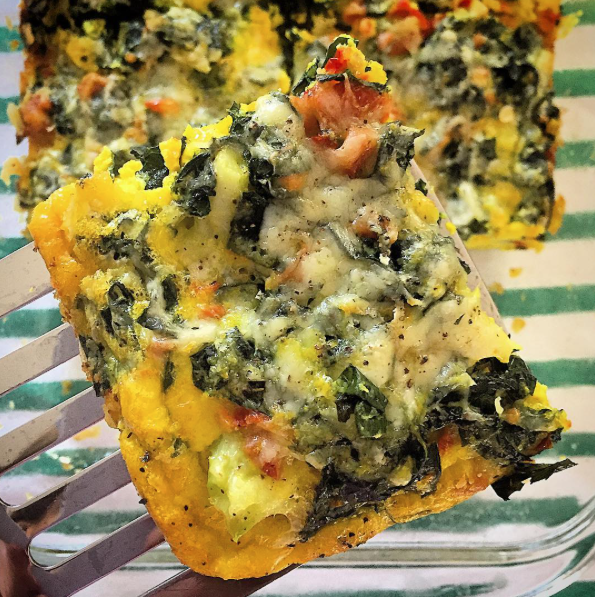
Food Fervour

veggie-dense salad

But when I lost my appetite last week, something clicked. I’ve no doubt it was borne of my negative state and my innate tendency to be “hard on myself” but I ordered myself to do that which I always want to, and try to do: cut added sweeteners from my diet. (Not that I have many anyway: only raw honey, organic maple syrup & rapadura sugar live in my house) I decided if I wanted anything sweet (and I am the biggest Sweet Tooth ever) I was only going to allow myself fruit (I am a fruit bat after all). That’s it. So the meals I ate for the couple of days were simple veggie-packed dishes – literally salads – anyway. (This was a crucial element to my ‘success’.)

I wasn’t sure how I’d go back at work. But fortunately, I was stationed on an espresso machine, so there was no direct temptation. On my lunch break however, I didn’t go anywhere near the refrigerated cabinet in the dining room: I simply pulled my homemade fare from the communal fridge and ate my healthy stuff. This was the third day since my ‘meltdown’. The next day was significantly more challenging, since I was stationed in a food outlet. Chocolate, cookies, chips staring at me all day. But….. NUH! My Willpower had well & truly kicked in. I was not going to have (added) sugars. And I have stuck to this. I knew, I know, if I make one slip, it will open the floodgates… and there’ll be no turning back.

Sugar really is addictive, science has proven this numerous times now. The Sugar v Cocaine experiment with rats is the most well-known: the rodents were allowed to self administer both sugar or cocaine from dispensers in their pens ….and they all opted for the sugar. That’s how powerful it is. (Link to PLOS source here.)

I recall one particular experience that really rammed this home to me: a friend had given me a block of Cadbury chocolate as a gift, even though I had some of my homemade raw dark chocolate in the fridge. Deciding to have “just one” row of the Cadbury, I returned to my desk. But within 3 or 4 minutes, I was back at the fridge & into the block again. This happened 3 more times. On my fourth visit to the fridge, I opted for a piece of MY chocolate (I usually make it with a very small amount of organic maple syrup)… and the craving instantly ceased. There were no more trips to the fridge.

Food Fervour

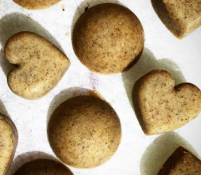
salted caramel choccies

The biggest surprise – which is not really a surprise at all – in this ‘Sugar Reset’ I’ve experienced, is the sudden and obvious aversion I now have to sugary foods. In just 3 to 4 days, I have re-sensitised my tastebuds to Sweetness. I’ve had this experience before, but each time it happens it blows you away at how intense the changes are. The first moment I noticed it this time around was when I made some ….chocolate.

I have a favourite recipe for Salted Caramel chocolate that’s sweetened only with dates (it’s a Thermomix recipe by Jo Whitton, the link to her blog Quirky Cooking is here) so I figured I’d allow myself to make some of that if I was permitting myself to eat whole fruits. But for a little variety, I also made some totally sugar free dark chocolate (literally just cacao powder & cacao butter) and created some chocolates that combined both of the flavours …like Cadbury’s ‘Top Deck’. The ‘shock’ came when I ate one of the plain Salted Caramel choccies, followed by a combined one. I preferred the latter. I preferred less sugar.

Food Fervour

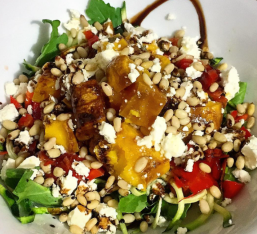
a roasted pumpkin salad I found quite sweet

I noticed it in more subtle ways as well: I made vanilla custard minus the maple syrup I usually add on top of the sugar-laden vanilla paste, and it tasted just fine. I actually felt a little ill when I made roasted pumpkin soup because the sugars caramelised in that naturally sweet veggie during the cooking process, then intensified in the thick, creamy soup. I’m even eating less whole fruit. Now that’s saying something!

The truth is, to truly give up sugar, we really need to discipline ourselves and restrict ….just for a very short period of time. Your body needs the chance to de-sensitise (and you will notice the difference). Think of your body as a spoilt child… when is the right time to finally say No?
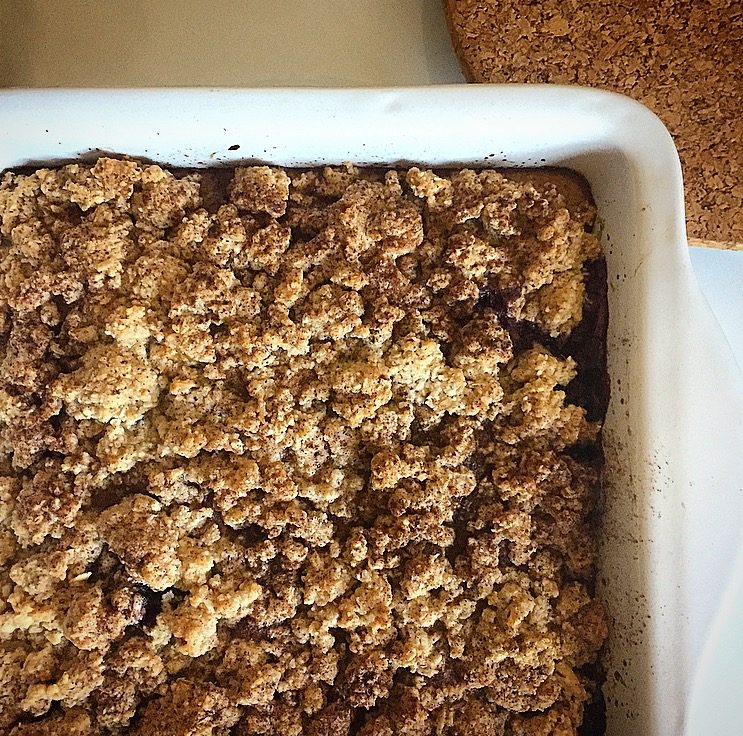
 

Slow Cooker Ratatouille

It was one of those days. I had no ideas, no incentive to cook, but I had heaps of veggies I felt compelled to use up.

Nothing even remotely appealed to me in the pages of recipes I scrolled through on the net. All I knew was that I couldn’t use the oven because it was just waaaaay too hot. I vacillated between Thermomix and slow cooker recipes but the slow cooker won in the end, simply because I knew I could leave it on overnight.

A lot of slow cooker recipes are deceiving in that they’re not just one-pot: many require you to pre-cook some of the ingredients. To a lazy cook like me that just doesn’t make sense. I want to throw everything into the crockpot at once, put the lid on and walk away.

So when I found a recipe that fit the bill on Voracious Veggie‘s website (direct link below) I proceeded to adapt it… just by adding more stuff, really.

https://voraciousvander.com/2013/02/01/slow-cooker-moroccan-eggplant/

Food FervourHere’s what I used:

1 tablespoon extra virgin olive oil (EVOO), 1 diced onion, 1 finely chopped garlic clove, 1 small diced carrot, 1 teaspoon dried oregano, 1 teaspoon cumin, ½ teaspoon chili powder (double this if you actually want to taste it!), ½ teaspoon paprika, ½ cup tomato paste, 1 cup vegetable stock, 8 mushrooms sliced, 1 small eggplant (cubed), ¼ butternut pumpkin (peeled & cubed), salt & pepper.

And this is all I did:

Pour the oil into the slow cooker, adding the onion, garlic and carrot, followed by the rest of the herbs & spices. Mix in the tomato paste & stock next, then add the mushrooms, eggplant & finally the pumpkin. Season with salt and pepper. Cook on low for at least 8 hours (I left mine on overnight… a total of 14 hours!) You can stir it up every now & then if you like.

Food FervourFor my first meal, I mixed through fresh basil leaves, then topped the lot with chopped kalamata olives and crumbled feta (see left). Deeelish. For the next serve, I popped a piece of grilled wild salmon on top of a plateful.

There are so many ways you could serve it up. Super simply, with bread or on toast (mmm, melt some parmesan in or over it!) or as a pasta ‘sauce’. The point is, it’s dead easy, it’s packed with micronutrients and fibre, low in fat & complex carbs (for those concerned about them) and …..it’s just EASY!!! (Yes, I repeated myself.)

Don’t despair if you don’t have all of the veggies I used… the following will substitute perfectly : capsicum, zucchini, actual tomatoes (this will significantly increase fluid content FYI) …even cauliflower and broccoli (just don’t expect the broccoli to hold its colour) The more the merrier! Let me know what you use. 🙂

Broccoli, Kale & Sundried Tomato Frittata

I LOVE frittatas. Mostly because I adore eggs (they’re an incredibly nutrient-dense food) but there’s a host of other reasons…

Frittatas are so. damned. easy. to make. You can put an amazing array of stuff in them (which in turn further inflates their nutritional value) and even better, they can be eaten cold as a healthy snack on-the-run. (They even freeze well …. even though I’ve never tried… coz I eat ’em too quickly!) Apart from the baking time, they’re pretty quick to prep.

I needed to harvest my very healthy kale plant a few days ago, and knowing that I could fit a LOT of leafy greens into a frittata, there was no question about what I’d be making. I had a fair bit of broccoli lolling about in the fridge too so grabbed that, but knew I’d need some ‘punchier’ flavour …so I pulled out the sundried tomatoes. And my addiction to turmeric (more specifically its nutritional powers) has reached the point where virtually every egg dish I make features it. This explains the ridiculously intense yellow colouring:Food Fervour

I used the following ingredients:
125gm broccoli florets, 100gm finely chopped kale leaves (if you find kale too strong in flavour you could easily substitute with spinach) 40gm finely chopped sundried tomatoes, 6 eggs, 1 (heaped!) tablespoon of freshly grated turmeric (you could use the powdered stuff, and less of it, if you’re not as fanatical about it as I) salt & black pepper (important inclusion to help your body receive turmeric’s power) 40gm grated cheddar (or parmesan if you prefer) plus extra for topping.

Super simple instructions:

Pre-heat the oven to 180ºC, grease (I use EVOO, that is extra virgin olive oil) and line a shallow baking dish with baking paper, set aside.

First you’ll need to steam your broccoli & kale. The broccoli will take only slightly longer than the kale, so place a steamer in a medium-large saucepan (unless you have another method of doing this – I have a Thermomix – yay for me!) with about one centimetre of water. Whack on the lid and as soon as it comes to the boil, pop in the broccoli. It should only take 3-4 minutes, tops. Haul it out, set it aside, and then throw in all the kale. This should only take about 2 minutes. You just want it to wilt. (Thermies, fill the bowl to the blades, pop the broccoli in the basket and cook 6 minutes Varoma, speed 1-1½. When done, set the broccoli aside, put the kale in the basket and cook for another 2-3 minutes, same temp & speed.)

The broccoli can be laid in the bottom of the baking dish immediately. Then you need to squeeze excess fluid from the kale. You could do this by hand (clean hands of course!) but I use paper towel so that I don’t lose any of the green to my fingers.

Next up, simply beat the eggs with the turmeric, salt and pepper. (Thermies: 5 seconds or so at Speed 5) then pop the kale, sun-dried tomatoes and grated cheese in and mix thoroughly (by hand… you don’t want to pulverise the veggies!)

Now, I opted to spoon the solids (the kale, tomato & cheese) into the baking dish, to fill in the gaps between the broccoli florets … I guarantee if you try to pour the whole mix out you’ll end up with a pile of vege in one spot! Call me OCD, but I’m fairly sure it’ll cook better if the liquids & solids are evenly distributed. I dribbled the remaining egg mix evenly throughout the dish as well.

Food FervourThe final step is to grate however much extra cheese you want, over the top of the entire dish then whack it in the oven for 30-40 minutes (just check it at the half hour mark: when it appears quite solid in the middle, it should be ready).

Unless your knife is very sharp, I’d let it cool a bit before slicing it into pieces. And I dare you NOT to eat any when you do this… 😉